

Aside from straight-up code, our source files are filled with two other categories of things: comments and compiler directives.
Comments are great, but we often leave a TODO somewhere and then it stays for all eternity. Sometimes you need a little friction (OK, maybe even a lot) to remind yourself or others to pay attention to certain parts of the code.
New in Swift 4.2 are two handy diagnostic directives that can help: #error and #warning. What do they do and how do they work?
Prepare for a dive into some C++ code as we examine how these directives are implemented. Along the way, we’ll look at the basics of how the Swift compiler works.
Diagnostic Directives
As their names suggest, the two directives will bring up diagnostic messages of different severity levels in the compiler:
#warningwill show a warning; compilation can still continue.#errorwill show an error and stop compilation.
In both cases, you need to provide some message text as well:
#warning("Needs to be refactored")
// some dodgy code here

#if !canImport(UIKit)
  #error("This framework requires UIKit!")
#endif
You can use these warnings and errors to raise issues and highlight bits of code, and the messages will show up in build logs or the Xcode console.
How It’s Made
The interesting thing to me is: how does one add a new bit of syntax to a language? I can imagine several things you’d need to think about:
- Adding something to the parser to recognize the new directives.
- Adding something (also to the parser?) that will check for the correct syntax:
#erroror#warningfollowed by parentheses with a string inside. - We need to actually trigger a diagnostic warning or error in the compiler.
Rather than look at every single detail, we’ll cover the highlights of the implementation in three parts: parsing, semantic analysis, and code generation.
Serious tip of the hat to Harlan Haskins for writing the proposal and implementing it. The code you see below is all from his commits bringing us this feature. 🙏
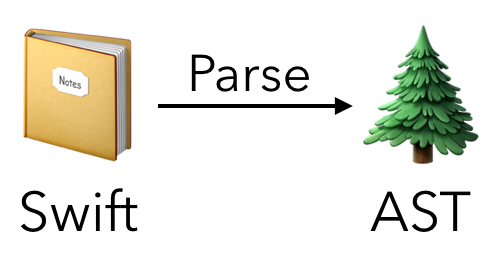
Parsing
The parsing step turns source code into an abstract syntax tree (AST) — a structured representation of your code.
Consider this single-line Swift file:
print("Hello parser!")
The raw AST (without type checking) looks like this:
1: (source_file
2:  (top_level_code_decl
3:    (brace_stmt
4:      (call_expr type='<null>' arg_labels=_:
5:        (unresolved_decl_ref_expr type='<null>' name=print function_ref=unapplied)
6:         (paren_expr type='<null>'
7:          (string_literal_expr type='<null>' encoding=utf8 value="Hello parser!" builtin_initializer=**NULL** initializer=**NULL**))))))
Each important bit, or token is on its own line. For example, the call expression (4), something named “print” (5), a parenthetical expression (6) and the string literal “Hello parser!” (7).
Tokens
The first step to #error and #warning is to get the parser to recognize these new words.
TokenKinds.def lists all the tokens and keywords for the parser to pay attention too, and has a section for # directives such as #available and #if and #selector.
We can add new definitions pretty easily thanks to the POUND_KEYWORD macro:
// Keywords prefixed with a '#'.
POUND_KEYWORD(warning)
POUND_KEYWORD(error)
That should get the keywords recognized. Next is to parse them, and extract the message portion. We’ll need some kind of storage to hold two bits of information:
- Whether it’s a warning or an error
- The message string
Declaration
Swift has the concept of declarations to distinguish parts of the language. An import, a variable declared with var or a constant with let, a new class or an extension — these are all different kinds of declarations.
We’ll define a new “diagnostic” declaration with a flag on whether it’s a warning or error, rather than have two separate declarations. Here’s the start of the class definition:
class PoundDiagnosticDecl : public Decl {
  SourceLoc StartLoc;
  SourceLoc EndLoc;
  StringLiteralExpr *Message;

  // ...
}
We have some member variables here to store the location in the source file as well as the message.
What about whether it’s a warning or an error?
DiagnosticKind getKind() {
  return isError() ? DiagnosticKind::Error : DiagnosticKind::Warning;
}
First, we have getKind() to return the correct DiagnosticKind — either error or warning. We already have errors and warnings in the compiler, so DiagnosticKind already exists.
The method here calls through to isError():
bool isError() {
  return Bits.PoundDiagnosticDecl.IsError;
}
What is this Bits thing? Every kind of declaration has 64 bits of space for some flags and metadata. For example, var has a flag on whether the declaration is static or not; enumeration cases have a flag on whether the case has associated values.
Our PoundDiagnosticDecl has a one-bit IsError field defined. If true (1) it’s an error; if false (0) it’s a warning.
Extra credit for the curious: see the rest of PoundDiagnosticDecl.
The Parser
OK, we’ve defined the tokens and set up our declaration subclass.
The parser runs through the source and finds a #warning or #error in the code. There’s a big loop and switch statement in ParseDecl.cpp and we’ll need to add two more cases:
case tok::pound_warning:
  DeclParsingContext.setCreateSyntax(SyntaxKind::PoundWarningDecl);
  DeclResult = parseDeclPoundDiagnostic();
  break;
case tok::pound_error:
  DeclParsingContext.setCreateSyntax(SyntaxKind::PoundErrorDecl);
  DeclResult = parseDeclPoundDiagnostic();
  break;
That takes us to parseDeclPoundDiagnostic() to do the string parsing work of pulling out the message text.
Of course, programmers can get things wrong. What if someone wrote this:
#warning "Here be dragons!"
Hey, they forget the parentheses around the string! We could throw a generic error here but why not be friendly and detect this particular error?
if (!hadLParen && !hadRParen) {
  // Catch if the user forgot parentheses around the string, e.g.
  // #warning "foo"
  diagnose(lParenLoc, diag::pound_diagnostic_expected_parens, isError)
      .highlight(messageExpr->getSourceRange())
      .fixItInsert(messageExpr->getStartLoc(), "(")
      .fixItInsertAfter(messageExpr->getEndLoc(), ")");
  return makeParserError();
}
We’ve already tokenized the line of code to look for the left and right parentheses (hadLParen and hadRParen). If both of them are missing, show the pound_diagnostic_expected_parens error.
To be extra friendly, note that this particular diagnostic has fix-its! Xcode will suggest adding the parentheses at the correct locations.
If all goes well, we need to instantiate one of our PoundDiagnosticDecl objects with the correct information: source location, whether it’s an error or warning, and the message text.
Extra credit:
- What are the other parse errors aside from missing parentheses? Check out DiagnosticsParse.def for the full list.
- Look at the entire parseDeclPoundDiagnostic() function to see how it parses the line and extracts the message.
Semantic Analysis
At the end of the parsing step, we’re left with an abstract syntax tree, a structured form of the original Swift source code. 🌲
The next compiler step is semantic analysis where it walks through the tree and does things like type checking.
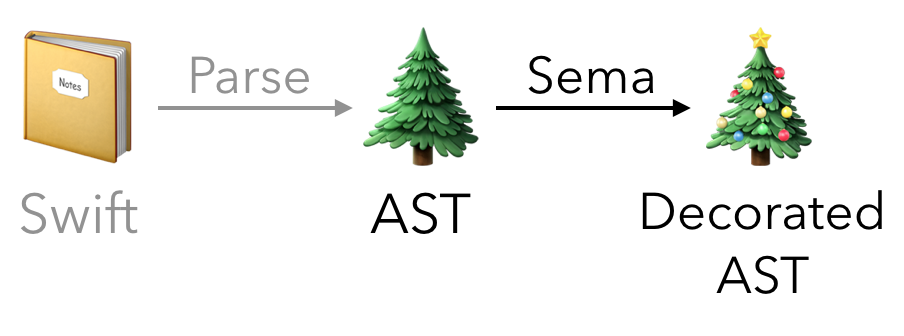
This is the phase where we’ll want to trigger actual warnings and errors from #warning and #error.
So we’re walking down the tree and come across one of our new PoundDiagnosticDecl objects. How do we handle it? TypeCheckDecl.cpp has the details:
TC.diagnose(PDD->getMessage()->getStartLoc(),
  PDD->isError() ? diag::pound_error : diag::pound_warning,
  PDD->getMessage()->getValue())
  .highlight(PDD->getMessage()->getSourceRange());
TC is the type checker object. You’ve already seen a diagnose() call in the parser, and the type checker has a similar method to raise warnings and errors.
In this case it’s not a diagnostic about the code itself, i.e. there isn’t a type mismatch or a syntax error. Instead, #warning and #error are meant to trigger diagnostics directly, and they use the same diagnose() as would be used for any other error or warning.
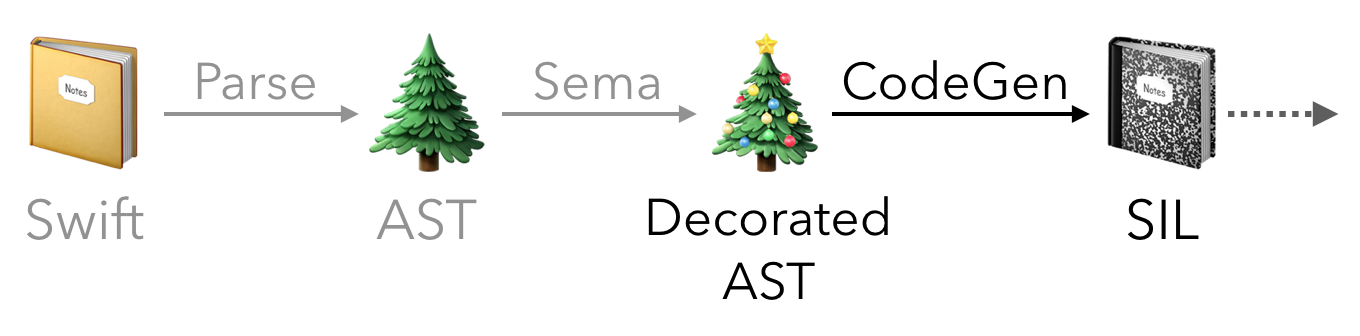
Code Generation
In the case of #error, compilation would have stopped already.
For #warning, compilation can continue on to the next phase: code generation. We’ve finished semantic analysis of the AST, and now we need to generate Swift Intermediate Language (SIL) code.
Again, we’re walking down the tree, writing some SIL as we go, and come across a PoundDiagnosticDecl instance. How do we handle it? Take a look at SILGen.cpp:
void SILGenModule::visitPoundDiagnosticDecl(PoundDiagnosticDecl *PDD) {
  // Nothing to do for #error/#warning; they've already been emitted.
}
Ha! It was a trick question. 😈
We’ve already generated the compiler warning, which was the whole point. There’s no functional difference in the program itself, so there’s no corresponding SIL.
That means it’s the end of the line for our diagnostic directives. If there’s no SIL then there’s nothing to carry on to the Intermediate Representation (IR) and beyond to the final compiled object file.
The Closing Brace
That was a new language feature in a nutshell. For #error and #warning, the steps were:
- Add tokens so the new directives are recognized.
- Parse the declarations and check for syntax errors.
- Store the declarations in the AST
- Add handlers for what to do when you come across one of these diagnostic directives.
For the seriously curious and nerdy, the full diff is here for your reading pleasure: Implement #warning and #error.
There are some more extra credit things to look at — check out all the tests as well as the delightful additions to the emacs mode and vim syntax. 😍
Are you ready to add your own directives to the language? Might I suggest adding #troll() or #rickRoll() as good starter tasks? 😜
}